Manual Scheduling
The Manual Scheduling feature in iMeetify allows you to directly schedule appointments without requiring the invitee to use the booking link. This is perfect when you want to create a meeting on behalf of someone — whether over a call, email, or in-person.
How to Manually Schedule an Appointment
Follow the steps below to manually schedule an appointment using iMeetify:
1. Select the Booking Page
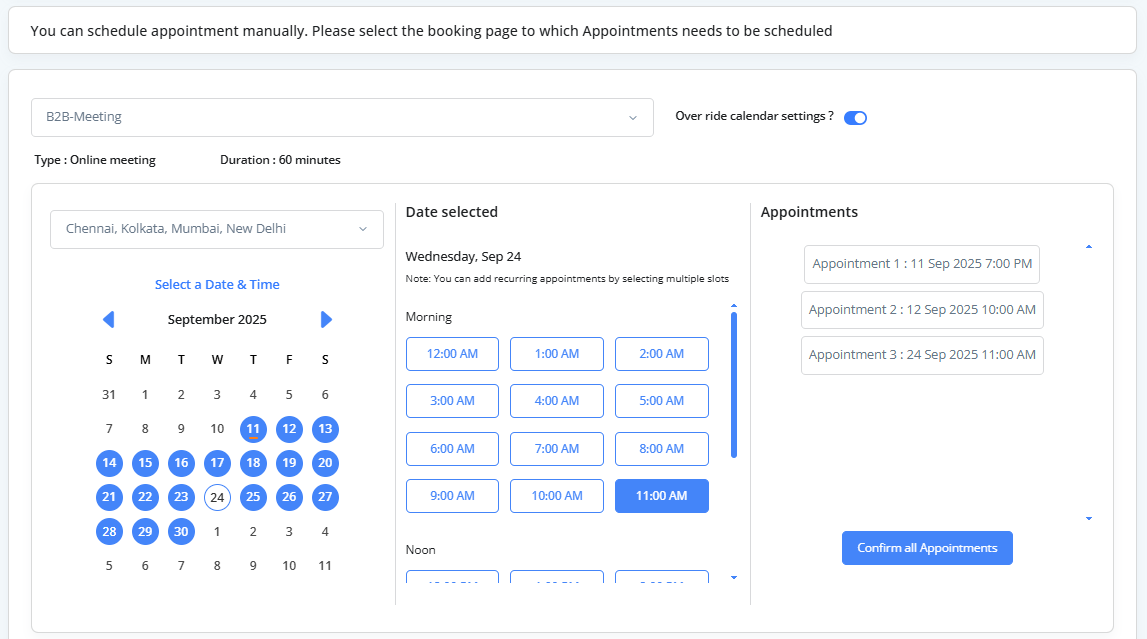
Start by selecting the Booking Page where the appointment should be added.
- Use the drop-down list to choose from your available booking pages
- This determines the calendar rules, duration, and event type.
2. Override Calendar Settings (Optional)
If needed, you can toggle the Override Calendar Settings option.
- This allows you to bypass the default availability or restrictions set on the booking page.
3. Choose Date & Time
Select your preferred date and time from the list of available time slots shown on the calendar
4. Confirm Appointment Details
Click on the Confirm All Appointments button once you’ve selected the slotr
5. Add Invitee Information
A pop-up will appear with the message:
You can add a new invitee or look up an existing invitee from your list and schedule an appointment manually!
- Enter the invitee’s First Name, Last Name, Email Address, and Mobile Number
- Use the search option to find an existing invitee if applicable
- Add guest(s) if required by clicking the “Add Guest” option.
6. Finalize the Appointment
Click “Proceed to Confirm” to complete the manual scheduling process.An invitation will be sent to the invitee(s) as per the settings of the selected booking page.