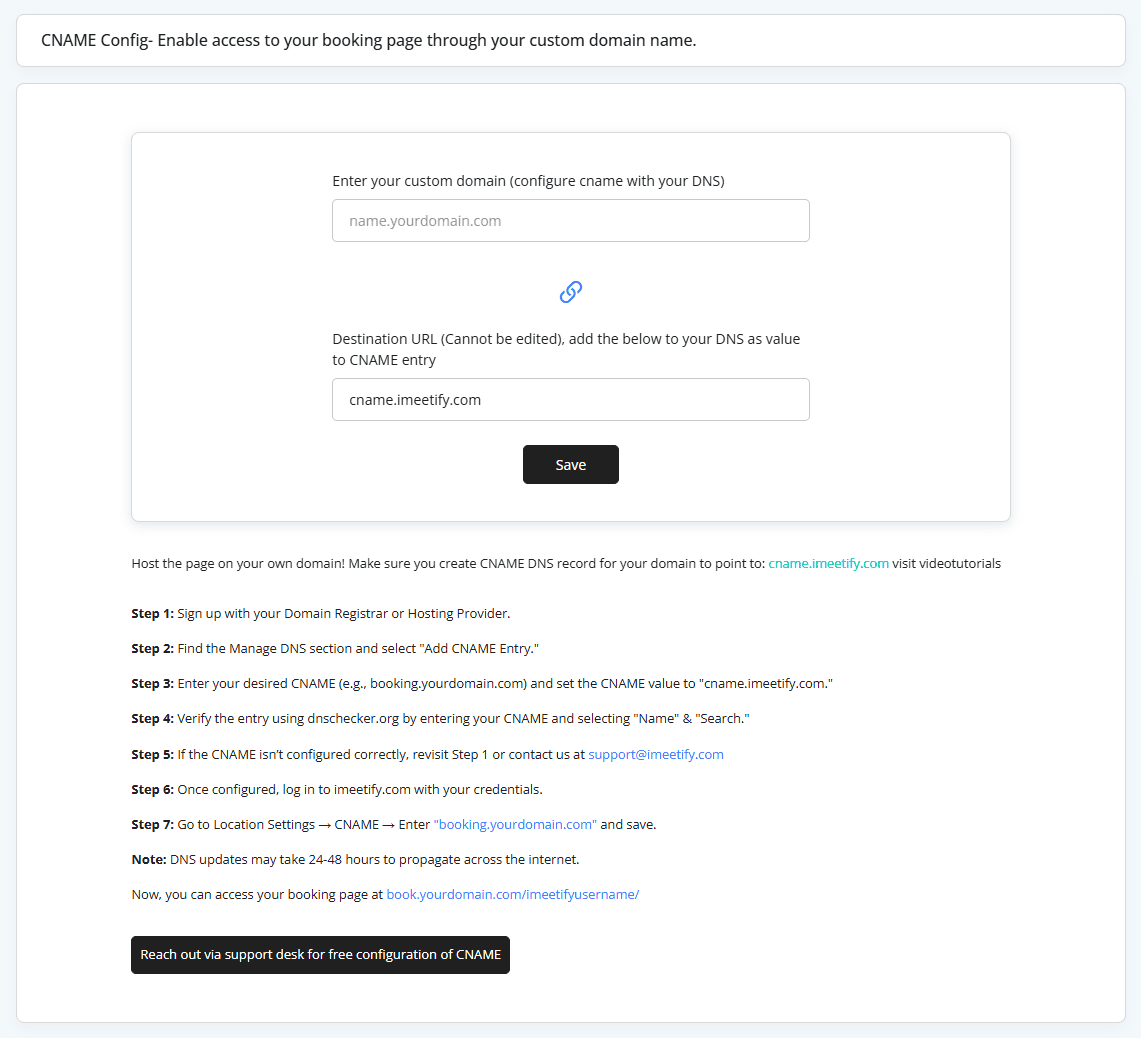
CNAME Settings
What is CNAME?
A CNAME (Canonical Name) record allows you to map your iMeetify booking page to your own custom domain name (e.g., booking.yourdomain.com). This ensures your clients access your scheduling page directly through your brand’s domain instead of an iMeetify link.
Why CNAME is Required for Businesses
- Brand Consistency – Keep your booking page aligned with your website and email domain.
- Professional Look – Customers trust a booking link under your domain more than an external one.
- Better User Experience – Provide seamless navigation without confusing third-party URLs.
Benefits of Using CNAME with iMeetify
- Strengthens your brand identity.
- Enhances customer trust and credibility.
- Enables easy sharing of branded booking links.
- Provides a professional online presence.
Information to be Saved in iMeetify
When setting up CNAME in iMeetify:
- Enter your custom domain (after configuring CNAME in your DNS).
- Destination URL (cannot be edited) – You must point your DNS CNAME entry to:
- cname.imeetify.com
- Click on Save to complete the setup.
✅ Once saved, your booking page will be accessible from your own domain!
How to Configure CNAME – Step by Step
Step 1
Sign in to your Domain Registrar or Hosting Provider account.
Step 2
Find the Manage DNS section and select Add CNAME Entry.
Step 3
Enter the following:
- CNAME (Host/Name): Example → booking.yourdomain.com
- Value/Destination: cname.imeetify.com
Step 4
Verify the DNS entry using dnschecker.org
- Enter your custom CNAME (e.g., booking.yourdomain.com).
- Select CNAME record type and click Search.
Step 5
If the CNAME is not resolving correctly:
- Double-check your DNS settings.
- Revisit Step 1.
- Or contact us at [email protected].
Step 6
Once configured, log in to your iMeetify account.
Step 7
Navigate to:
Location Settings → CNAME → Enter booking.yourdomain.com → Save.
Note
DNS updates can take 24–48 hours to propagate across the internet. Please be patient before testing your custom booking URL.

